WEEK 12 - Connect the server with browser
In this week, we learn about how to connecting the database server with the browser. The example we take is from w3school. After that we enter the data based on our database.
First we need to create a table in php, purpose to show a simple interface to present the database.
The following is the code to present the database

First we need to create a table in php, purpose to show a simple interface to present the database.
The following is the code to present the database
<!doctype html>
<html>
<head>
<meta charset="utf-8">
<title>Untitled Document</title>
<style>
#customers {
font-family: "Trebuchet MS", Arial, Helvetica, sans-serif;
border-collapse: collapse;
width: 100%;
}
#customers td, #customers th {
border: 1px solid #ddd;
padding: 8px;
}
#customers tr:nth-child(even){background-color: #f2f2f2;}
#customers tr:hover {background-color: #ddd;}
#customers th {
padding-top: 12px;
padding-bottom: 12px;
text-align: left;
background-color: #4CAF50;
color: white;
}
</style>
</head>
<body>
<?php
$servername = "localhost";
$username = "root";
$password = "";
$dbname = "dbgui";
// Create connection
$conn = new mysqli($servername, $username, $password, $dbname);
// Check connection
if ($conn->connect_error) {
die("Connection failed: " . $conn->connect_error);
}
$sql = "SELECT guest_id, name, last_name, phone FROM guest";
$result = mysqli_query($conn, $sql);
if (mysqli_num_rows($result) > 0) {
echo "<table id=\"customers\">";
echo "<tr>";
echo "<th>Guest ID</th>";
echo "<th>Name</th>";
echo "<th>Phone</th>";
echo "</tr>";
// output data of each row
while($row = mysqli_fetch_assoc($result)) {
echo "<tr>".
"<td>" . $row["guest_id"]. "</td>" . "<td>" . $row["name"]. " " . $row["last_name"]. "</td>" . "<td>" . $row["phone"]. "</td></tr>";
}
} else {
echo "0 results";
}
echo "</table>";
$conn->close();
?>
</body>
</html>
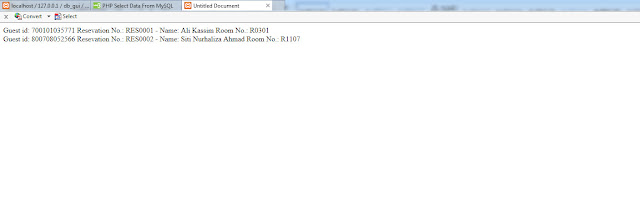
After that, this is the result table and the database information<html>
<head>
<meta charset="utf-8">
<title>Untitled Document</title>
<style>
#customers {
font-family: "Trebuchet MS", Arial, Helvetica, sans-serif;
border-collapse: collapse;
width: 100%;
}
#customers td, #customers th {
border: 1px solid #ddd;
padding: 8px;
}
#customers tr:nth-child(even){background-color: #f2f2f2;}
#customers tr:hover {background-color: #ddd;}
#customers th {
padding-top: 12px;
padding-bottom: 12px;
text-align: left;
background-color: #4CAF50;
color: white;
}
</style>
</head>
<body>
<?php
$servername = "localhost";
$username = "root";
$password = "";
$dbname = "dbgui";
// Create connection
$conn = new mysqli($servername, $username, $password, $dbname);
// Check connection
if ($conn->connect_error) {
die("Connection failed: " . $conn->connect_error);
}
$sql = "SELECT guest_id, name, last_name, phone FROM guest";
$result = mysqli_query($conn, $sql);
if (mysqli_num_rows($result) > 0) {
echo "<table id=\"customers\">";
echo "<tr>";
echo "<th>Guest ID</th>";
echo "<th>Name</th>";
echo "<th>Phone</th>";
echo "</tr>";
// output data of each row
while($row = mysqli_fetch_assoc($result)) {
echo "<tr>".
"<td>" . $row["guest_id"]. "</td>" . "<td>" . $row["name"]. " " . $row["last_name"]. "</td>" . "<td>" . $row["phone"]. "</td></tr>";
}
} else {
echo "0 results";
}
echo "</table>";
$conn->close();
?>
</body>
</html>


Comments
Post a Comment